24 Tips on Creating Basic Goddess Braids
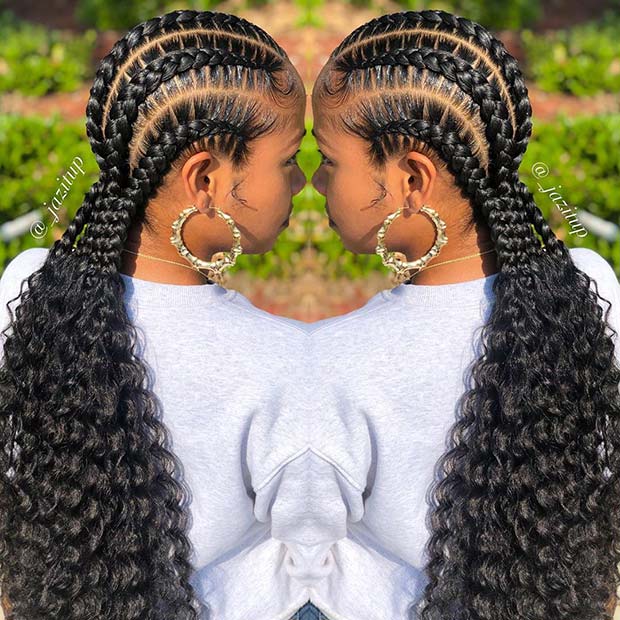
Braids near me: When you hear the term “goddess braids,” you may think of the protective style that uses French braids, extensions, and regular braids. On the other hand, you might think of the French crown braid instead. Both styles are ideal for keeping natural hair healthy. Once you know the basics of both, you can even combine them to create more elaborate crown braids, or simplify them to create shorter French braids!
Braids near me
1. Things You’ll Need
Creating Basic Goddess Braids
- Conditioning cream
- Edge control
- Hair oil
- Rat-tail comb
- Wide toothed comb
- 3 “jumbo packs” of kanekalon hair
- Electric kettle or a boiling pot of water
2. Creating a Goddess Crown Braid
- Conditioning cream
- Holding gel
- Hair butter
- Rat-tail comb
- Hair clips
- Black or clear hair elastics
- Bobby pins
Braids near me
3. Start with clean, dry hair.
Detangle your hair as much as possible with a wide-toothed comb; use leave-in conditioner, if needed. Then dry and straighten your hair as much as you can, especially if you have naturally curly or kinky hair. This will help your braids look neater and straighter.
- Use a good-quality shampoo and conditioner when washing your hair. This will give it a healthy start.
- Use a detangling product to help work out stubborn knots and kinks.
4. Part your hair in rows, from hairline to nape.
Use the handle of rat-tail comb to create the parts. Secure each section with a clip. How many rows you do depends on how many braids you want. Most people stick with five or six: two on each side and one or two down the center.
- Apply some edge control to your hairline and parts.
Braids near me
5. Choose a row to start with, then section it off further.
Choose one of the bottom-most rows on either side of your head. Use the handle of a rat-tail comb to separate a thin, vertical section from the front of the row, right at the hairline. Split the rest of the row in half, all the way down to the nape.
- You’re splitting the row like this to make the hairs easier to grab.
- The top mini-row will be feeding into the top kanekalon strand. The bottom mini-row will be feeding into the bottom strand.
Braids near me
6. Get a pack of kanekalon hair and thin out the ends.
Gently tug on the ends of the kanekalon hair, about 6 inches (15.24 centimeter) from the tips. This will thin out the ends of the extension without sacrificing length. It will help the braid taper towards the end and make it look more realistic.
- To complete this style, you’ll need at least 3 packs of hair. Before braiding, thin out the ends for all of the packs.
- If the hair looks knotted, gently comb through it.
7. Divide the kanekalon hair in half, then split it into thirds.
Divide the kanekalon in half first. Set one of the halves aside for the next braid, and hold the other one in your hand by the middle. Keep the right side of the bundle whole, and split the left side in half. You’ll have three strands: two thin and one thick.
- You can use a natural color, such as brown or black, or an unnatural color, such as red or purple.
Braids near me
8. Add the kanekalon hair to your own hair.
Set the kanekalon hair behind the front section you jut sectioned off. Position the thick, “whole” strand behind the hair. Keep the two thin, split strands against your head. You’ll have three sections:
- A bottom kanekalon section
- A middle kanekalon and real hair section
- A top kanekalon section
9. Begin to French braid your hair.
Gather some hair from the bottom section of your hair, and add it to the bottom kanekalon strand. Cross it over the middle kanekalon/real hair section. Gather some hair from the top section of your hair, and add it to the top kanekalon section. Cross it over the middle one too.
Braids near me
10. Continue to French braid your hair, keeping the stitches tight.
You can gather small sections of hair for a tighter braid, or larger sections for a looser one. Regardless of size, you want to keep the stitches tight. Keep braiding until you reach the nape of your neck.X
11. Finish off with a regular braid.
When you have no more hair to add into your French braid, switch to doing a regular braid. Keep braiding until you reach the end of the kanekalon hair. Remember to keep the stitches nice and tight.X
Braids near me
12. Repeat the process for the rest of the rows.
This style can take a long time to complete, so remember to take breaks. If you want to, you can also ask a friend to help you with your hair to get the style done faster.
- Remember: you will need half of a “jumbo pack” per braid.
13. Touch the braids up.
Trim away any stray hairs along the kanekalon braid with small, pointed scissors. Smooth down any unruly strands along the French braid with a good quality gel.X
14. Seal the ends of the braids with hot water in an electric kettle.
Fill the kettle with water and plug it in. Dip the end of the braids into the water and turn the kettle on. Allow the water to come to a boil. Pull the braids out when the timer goes off; some kettles may shut off automatically.
- Wrap the ends of the braids in a towel to remove the excess water.
- If you don’t have an electric kettle, boil a pot of water on the stove.
Braids near me
15. Start with blow-dried hair.
Your hair does not have to be perfectly straight, but it needs to be as stretched out as possible. This style will give you a beautiful Dutch braid that wraps around your head, like milkmaid braids.
16. Part your hair in preparation for the crown braid.
Start with a deep side part on the left side of your head. Make it curve around the back of your crown. When you reach the center, make it go straight down the back-center of your head. Gather the hair on the left side of your head into a clip.
- Use the handle of a rat-tail comb to create a neat, clean part.
- You may have to use two clips: one for the hair in front of your ear and one for the rest.
Braids near me
17. Apply gel, edge control, or pomade to your part and hair.
Smooth down the hair along your hairline and part with a conditioning cream. Follow up with some gel for extra holding power. Next, distribute a rich hair butter throughout your hair to help further protect it.
- You can also use a cream or hair butter.
- A rich, conditioning cream, like what you’d use for doing cornrows, would work great here.
18. Begin a regular braid to the right of the part.
Gather a thin section of hair from your hair line, right next to the part. Split it into three even strands. Cross the front strand under the middle one, then do the same with the back strand.
- Make sure that you are crossing the strands under and not over, otherwise the Dutch braid won’t work out.
- If you want your braid to appear thicker and fuller, you should add kanekalon braiding hair to it.
Braids near me
19. Begin to Dutch braid your hair.
Gather some hair from your hair line, and add it to the front strand. Cross the front strand under the middle one. Add some more hair to the back strand, and cross it under the middle one as well.
20. Dutch braid your hair until you reach the back-center part.
Continue Dutch braiding your hair across your forehead and down the side of your head, towards your right ear. Keep braiding until you reach the part on the back of your head, then stop.
- Keep your Dutch braid as close to the edge of your hair as you can.
- Keep the stitches nice and tight. Smooth your hair down as you gather and cross it.
21. Finish off with a regular braid.
Continue crossing the outer strands under the middle one until you run out of hair to braid. Secure the end of your hair with a black or clear hair elastic.
Braids near me
22. Repeat the process on the other side of your head.
Unclip the hair on the left side of your head. Begin a regular braid right next to the part, then continue with a Dutch braid until you reach the back of your head. Finish off with a regular braid, then tie it off with a black or clear elastic.
- Remember to apply the cream and gel to your part and hairline, and the butter to your hair.
23. Cross the braids across the back of your head and pin them.
Pull the right braid across the back of your head towards the left Dutch braid. Secure it to your hair with bobby pins. Repeat this step with the left braid by crossing it over to the right Dutch braid, and pinning it in place as well.
Braids near me
24. More tips
-
You can use the techniques from the basic goddess braid method for a goddess crown braid.
-
You can skip the extensions for a basic goddess braid, and have mini French braids instead.
-
Play around with fun colors for the extensions. Choose something that matches the season, such as a deep, rich colour for Fall, and a bright colour for Summer.
- For a natural look, use extensions that match your hair color.
- Make the style last longer by wearing a silk scarf or cap over your hair at night.
- If your braids are looking dull, mist them with some shine spray