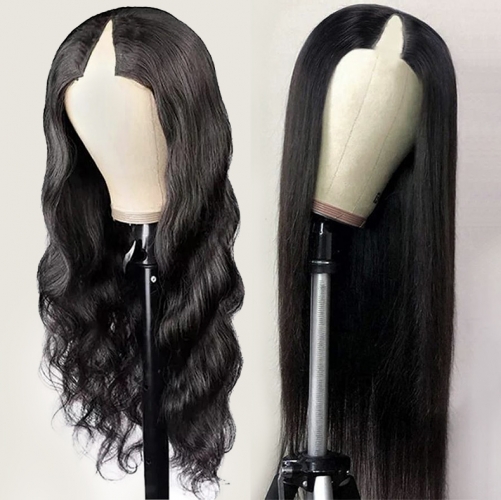
v part wig: A lace front wig features lace near your hairline, but it typically has a more comfortable, stretchy material for the rest of the scalp. The lace gives you the benefit of a natural-looking hairline, but lace front options are typically more affordable than a full-lace wig. You can also purchase a lace frontal, which is a piece that sits along your hairline, but you’ll need to install tracks in the rest of your hair to get a full look. Either way, the most secure way to install a lace-front wig is to sew it into place.
Read also: 18 Tips on Joining a Hair Salon Franchise
v part wig
Don’t be afraid to give up the good to go for the great. You can request publication of your article for publication by sending it to us via our Email below. businesshabblog@gmail.com or SMS/WhatsApp) or call +2347034920650. Click here to start business now with businesshab.com
businesshabblog@gmail.com
1. Thread a large C-shaped needle with cotton thread matching your wig. Slip the end of the thread through the eye in the needle, then pull it through until you have a double strand that’s about 3 ft (0.91 m) long. Knot the end of the thread, and cut the string below the knot to free it from the spool.
- Make sure the thread matches the hair on your wig closely so you won’t be able to see the stitching.
- A curved needle is best when you’re doing a lace-front wig sew in because the tip of the needle will be curved away from your scalp, making you less likely to poke yourself.
v part wig
2. Braid your hair into cornrows. In order to ensure your hair lays flat under your wig, part your hair into small rows, about 1⁄2 in (1.3 cm) wide. Start with a basic 3-strand braid at the start of each row, then work your row down the row, adding a little hair each time you criss-cross the strands. When you get to the end of your scalp, keep braiding the remaining hair all the way to the end.
- To secure the end of the braids, either pull them all into a ponytail or sew them down. To sew them, loop the tail up so it runs parallel to the rest of the braid. Then, run 2-3 stitches through the end of the braid and the body of the braid beside it. Tie a knot and cut off the excess string when you’re done.
- If the braids are big or chunky, your wig won’t lay down flat. However, try not to braid too tightly, as this could lead to discomfort or even hair loss.
- Cornrows often go from the front of your head to the back. However, for for a more protective style, you can part your hair down the middle and braid from the center down the sides of your head. For instance, the first braid might go down your temple, behind your ear, and to the nape of your neck.
See also: The Ordinary Hair Care How to Use( See 20 Tips)
3. Cut a lace frontal to fit from ear-to-ear. If you’re using a lace frontal, measure along your hairline from one ear to the other. Then, subtract 1 in (2.5 cm) from that number to account for the fact that lace stretches. Using that new number, measure along the edge of the lace frontal and cut away any excess with scissors.
- For instance, if your hairline measures 12 in (30 cm) long, you’d cut your lace frontal to be 11 in (28 cm) long.
- A frontal is a hairpiece that covers the area from your hairline to the top of your head, from one ear to the other. Typically, you wear these with sew-in extensions. If you have a full lace-front wig, you shouldn’t have to cut it.
v part wig
4. Put on a mesh or stocking cap if you like. You may find that wearing a mesh or a stocking cap helps reduce some of the itching associated with wearing a wig. However, since it won’t affect how securely the wig stays in place, it’s fine to skip the cap if you prefer not to wear one.
- If you do wear a cap, you can sew it down with a few stitches near your temples, crown, and the base of your neck, if you’d like. Make sure to pass the needle through one of your braids to secure the cap.
- If you’re wearing a frontal, either skip the cap or choose a wide mesh so you’ll still be able to install your extensions.
5. Place the wig on your head with the hairline exactly where you want it. Once your hair is neatly braided out of the way, slide your fingers into the sides of the wig and pull it onto your scalp. If you’re using a full wig, fit it over your entire head, from your hairline to the base of your neck. If you’re wearing a lace frontal, place it so the front is along your hairline, with the back typically landing just before the crown of your head.
- Typically, it looks best if you line up the hairline of the wig with your natural hairline, but you can experiment with pulling it a little higher or lower to see what you like.
- It’s important to line up the hairline of the wig where you want it since it will be hard to adjust the wig once it’s sewed down.
Tip: If the length of the wig gets in the way when you’re trying to sew, braid the wig or put it into a ponytail.
v part wig
6. Stitch the wig along the braid closest to your ear. Hold the hairline of the wig in place securely with one hand, then take your curved needle and slip it through the lace near the front of your wig, just in front of your ear. Push the needle into the braid, then follow the natural curve of the needle to bring the thread out of the braid and back through the lace. Continue making small, neat stitches along the length of the braid, then make a small knot behind your ear and cut the excess thread.
- If you’re wearing a stocking cap, sew through the material of the cap.
- Whether your braids run from front-to-back or from your center part down, you should have a braid that goes behind each ear. Make the stitches along this braid.
- All you need is a basic in-and-out stitch for this. However, if you’d like, you create an even more secure blanket stitch by passing the needle through the loop made by each stitch before you pull it tight.
Read on: 12 Tips to Get the Best of Navy Hair Care Products
Tip: Remember to knot the thread again after you cut it so you can keep using the same piece. If you find that your thread is getting too short as you sew down the wig, just rethread the needle with a new piece.
7. Make stitches from one ear to the other along the top of your head. If you’re wearing a full lace-front wig, make a part from ear to ear over the top of your head. Comb the hair in front of the part forward. Then, make 3-4 small stitches in each braid all along the part you made.
- Since you won’t normally part your hair along this line, these stitches won’t be visible.
- If you’re wearing a lace frontal, make these stitches along the back of the hairpiece.
- Hold the wig tightly to be sure it doesn’t slide back as you’re doing this.
v part wig
8. Stitch along the braid above your other ear. Pull the lace-front down on the final side, making sure it’s tight enough to be secure, but not so tight that it’s uncomfortable. Then, place a row of stitches along the braid above the opposite ear from where you started, knotting the thread just behind your ear.
- Use the same simple stitch or blanket stitch you used on the opposite side.
Read on: 16 Best Hair-care Look Tips for Women
9. Add a row of stitches from front to back if you need more security. Use your fingers and try to wiggle your wig back and forth. If the wig doesn’t feel secure, make a part somewhere that you wouldn’t normally part your hair, then add a row of stitches from the front of your hairline to the back row of stitches you made earlier. Make sure the stitches go through a braid each time.
- If you’d like, you can make a row of front-to-back on either side of the wig.
v part wig
10. Install sew-in tracks from the bottom up if you’re wearing a frontal. Since a frontal wig won’t cover all of your hair, you’ll need to wear extensions, also called weave or tracks. To do that, place a weft of hair along the base of your neck, and stitch it down to the braids there. Then, continue sewing down rows of tracks, spacing them about 1⁄4–1⁄2 in (0.64–1.27 cm) apart until you reach the back edge of the frontal.
- Use the same basic stitch you used to hold the frontal in place.
- This will give you a thick head of hair that often looks more natural than using a full wig.
11. Trim off any visible lace around your hairline. If it’s your first time wearing this lace-front wig, there will likely be some extra lace in the front of the wig. Once you’ve sewn the wig securely into place, use nail scissors or another small pair of scissors to trim away any visible lace.
- Be careful not to cut into the actual wig as you do this. Only cut the excess lace along your forehead.
v part wig
12. Apply glue gel for hair along the hairline of the wig and press it down. Dip your finger or a small concealer brush into glue gel and brush it beneath the very front of your lace-front wig. Then, press the front of the wig down into the gel.
- This will help prevent the lace from lifting away from your forehead as you wear the wig.
- Got2b is a popular brand of glue gel for laying down the front of a wig, but you can use a different product, if you prefer.
Read on: 10 Best Tips to Look Good on Your Hair and Head
13. Use edge control if you want baby hairs. If you love the styled look of the little hairs around your hairline, take a little edge control on your fingertips and smooth down any fine hairs along the edge of the wig. Sweep the hairs casually back toward your ears for a natural look, or arrange them in swoops along your hairline for a more dramatic look.
- Edge control is a fast-drying styling product that you can use to lay down the fine hairs near your hairline. Many high-quality wigs will feature these baby hairs.
- You can use a sew-in lace front wig for a couple of months.
- It is better not to have it for longer than six to eight weeks. You can keep it for ten weeks at the maximum.
- After that, remove it, comb through and condition your hair and then put it back up.
v part wig
14. Things You’ll Need
- C-shaped needle
- Thread matching your wig
- Lace-front wig or frontal
- Comb
- Glue gel
- Extensions (optional)
- Edge control (optional)